What You’ll Build
A chat system that:- Accepts a user question (via chat, API, or AI assistant)
- Searches your knowledge base for relevant information
- Uses an AI model to generate an accurate answer grounded in your documents
- Returns the answer with source references
Prerequisites
- A Jinba Flow account (Sign up here)
- Documents to upload — PDFs, DOCX, or text files you want your chat to reference
- Basic familiarity with Jinba Flow concepts — Flows, Steps, and Tools
Architecture Overview
Before we start building, here’s how all the pieces fit together:Part 1: Set Up Your Knowledge Base
Step 1: Create a Knowledge Base
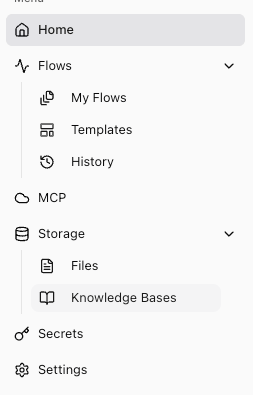
Navigate to Storage
Create a New Knowledge Base

Note Your Knowledge Base ID

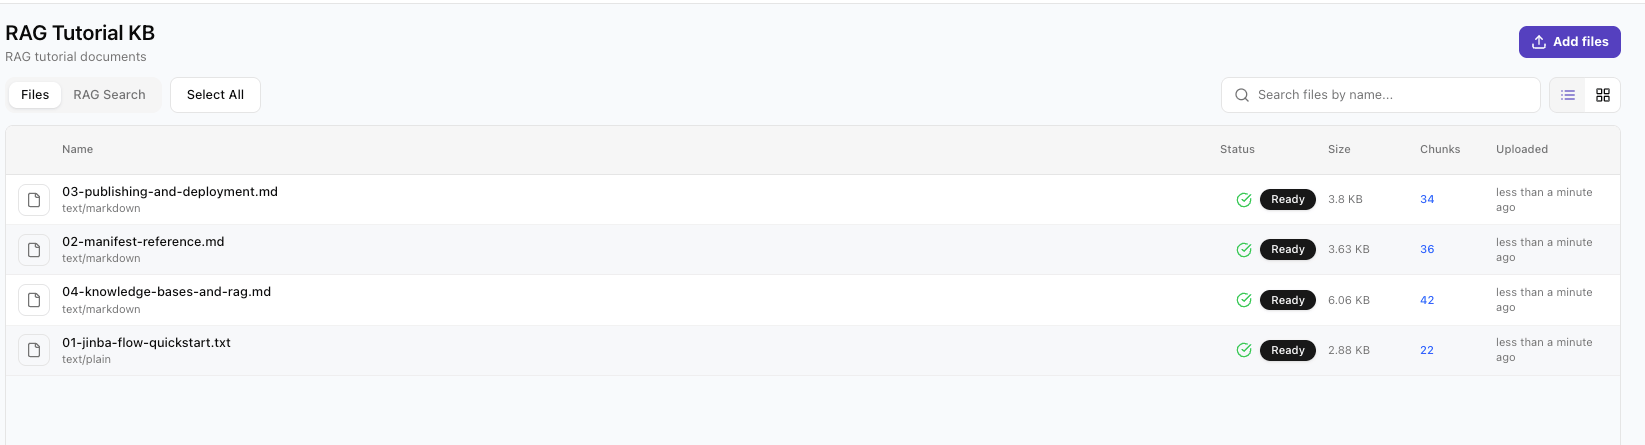
Step 2: Upload Documents
Open Your Knowledge Base
Upload Files
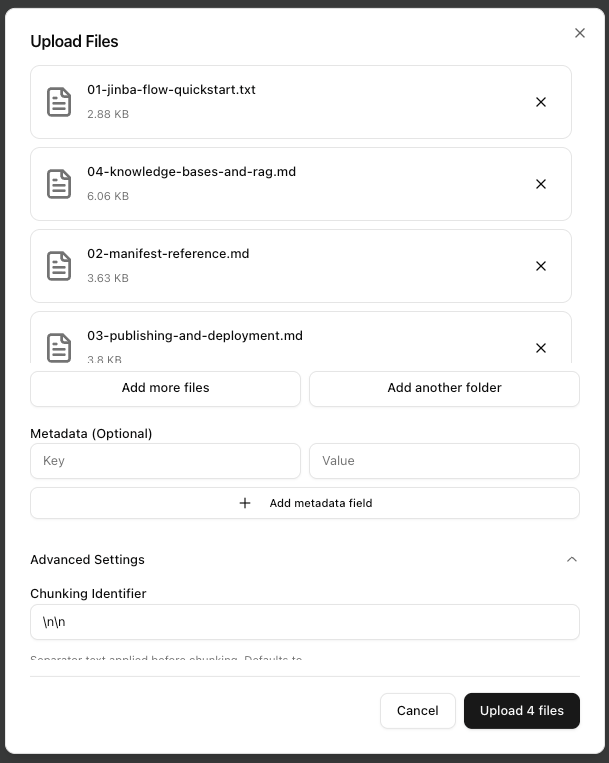
Wait for Processing
Step 3: Store Your Credentials
Before building the flow, store the required secrets in your workspace.Navigate to Credentials
Add Secrets
OPENAI_INVOKE with Jinba API credit.Part 2: Build the RAG Flow
Now let’s create the workflow that powers the chat system.The Complete Manifest
You can paste this directly into the YAML Coding Panel:Alternative: Build the Flow Manually in the Editor
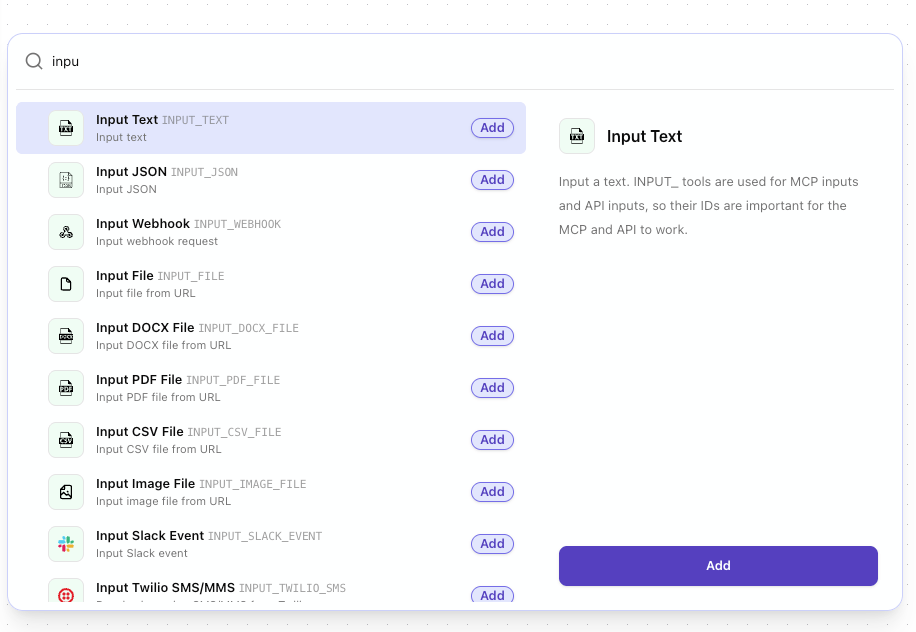
If you want to learn how each node is assembled visually, follow this manual path instead of pasting YAML.Add the Input Text node
Add and configure the Vector Search node
JINBA_VECTOR_SEARCH node.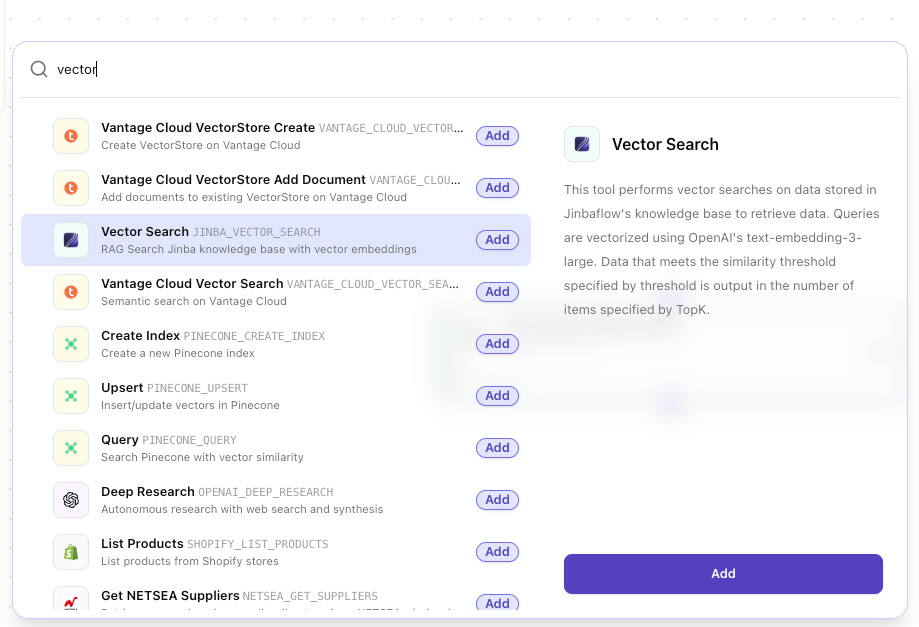
-
Token:
JINBAFLOW_WS_API_KEYsecret -
Query:
{{steps.user_question.result}} - Knowledge Base ID: your knowledge base ID
-
Top K:
5 -
Threshold:
0.3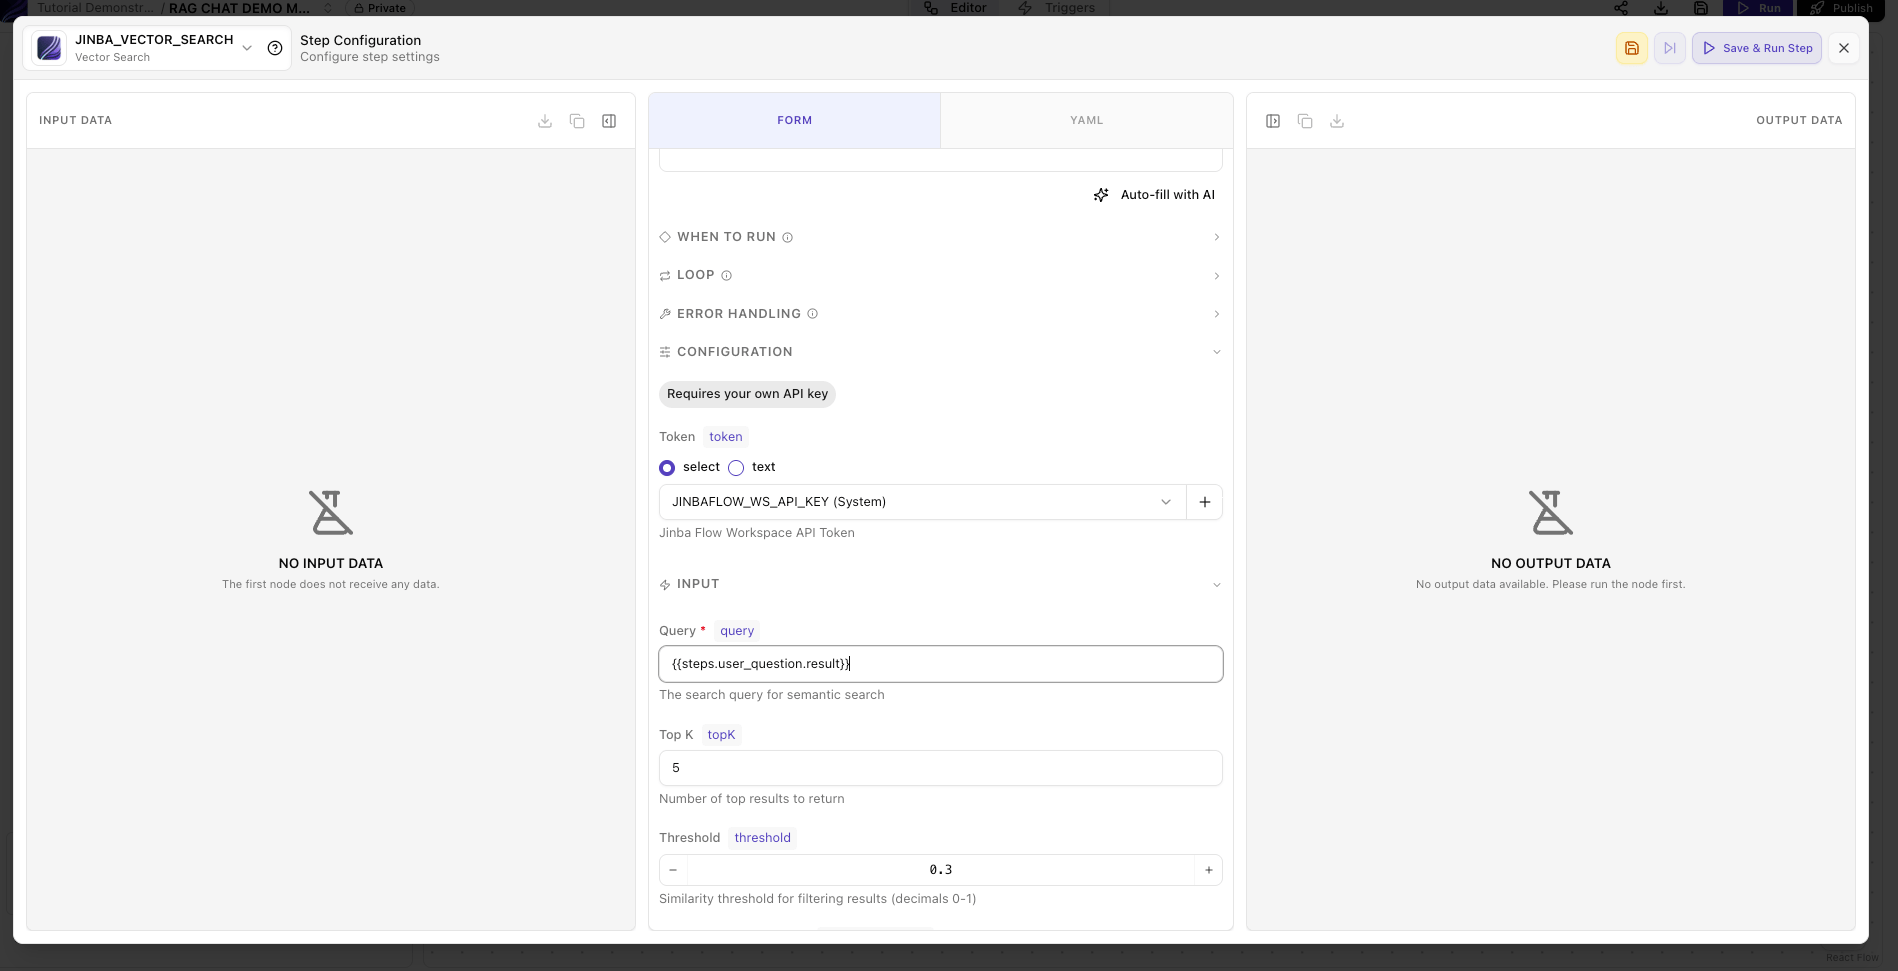
Add and configure the OpenAI Invoke node
OPENAI_INVOKE.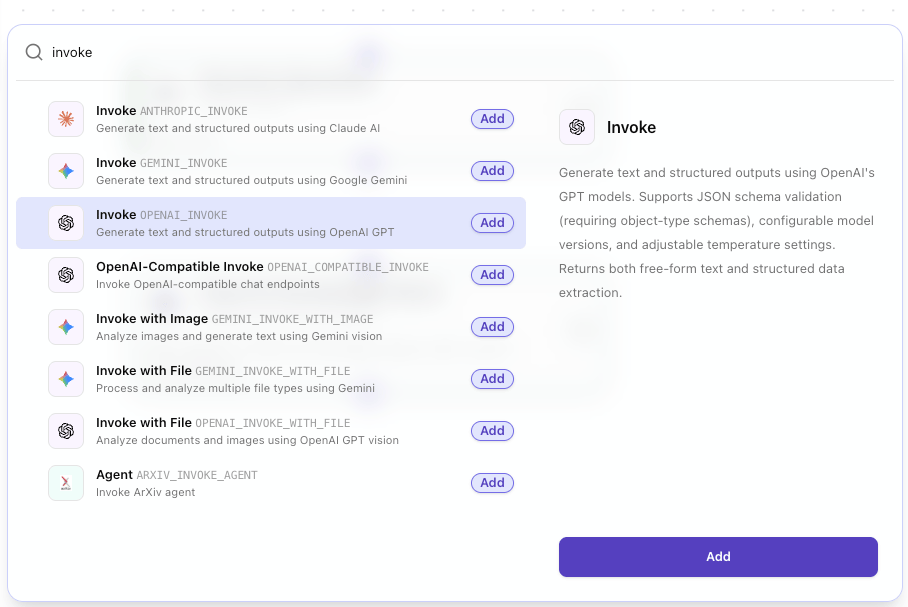
gpt-4o, then paste the same prompt shown in the YAML example so the model answers only from retrieved knowledge base context.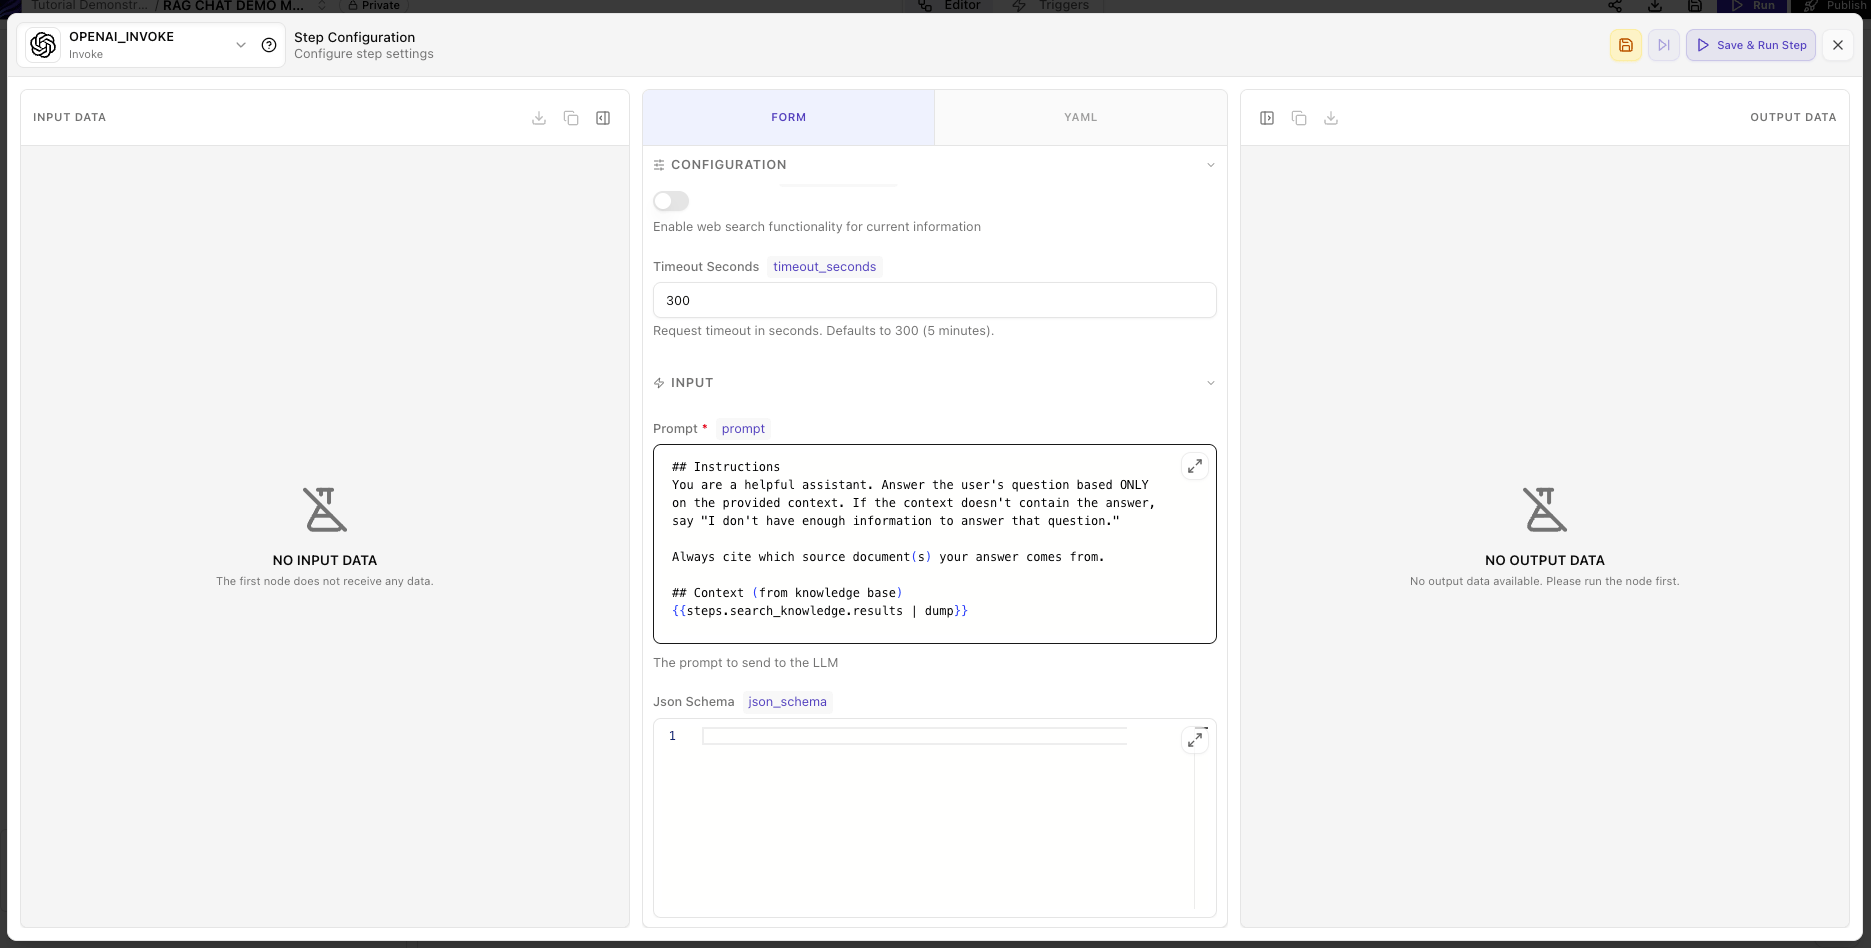
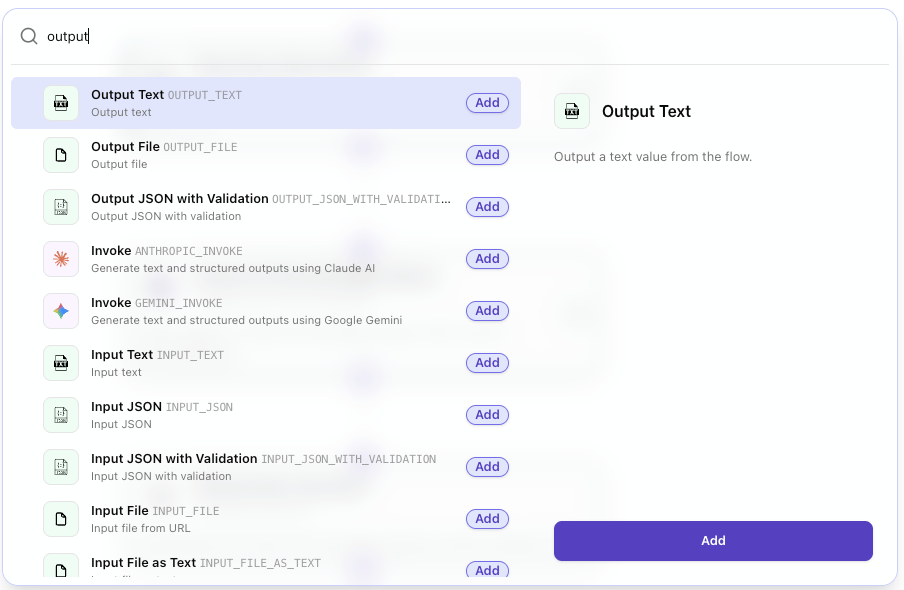
Add and configure the Output Text node
Step-by-Step Walkthrough
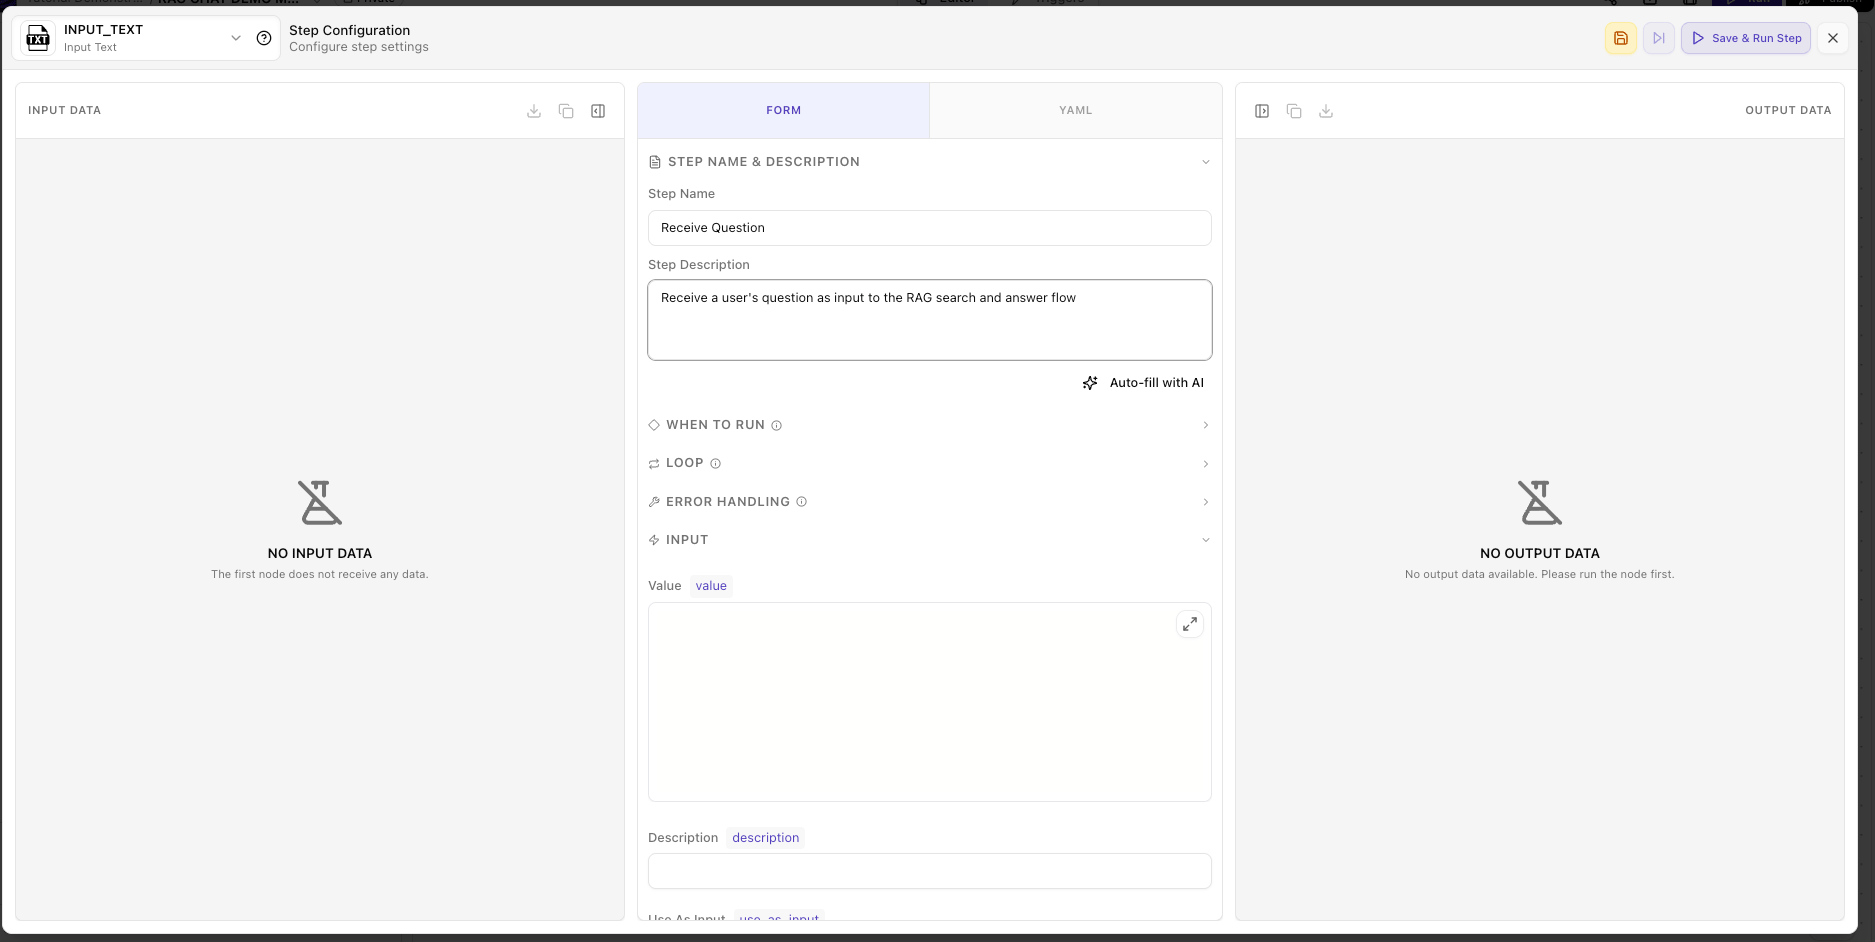
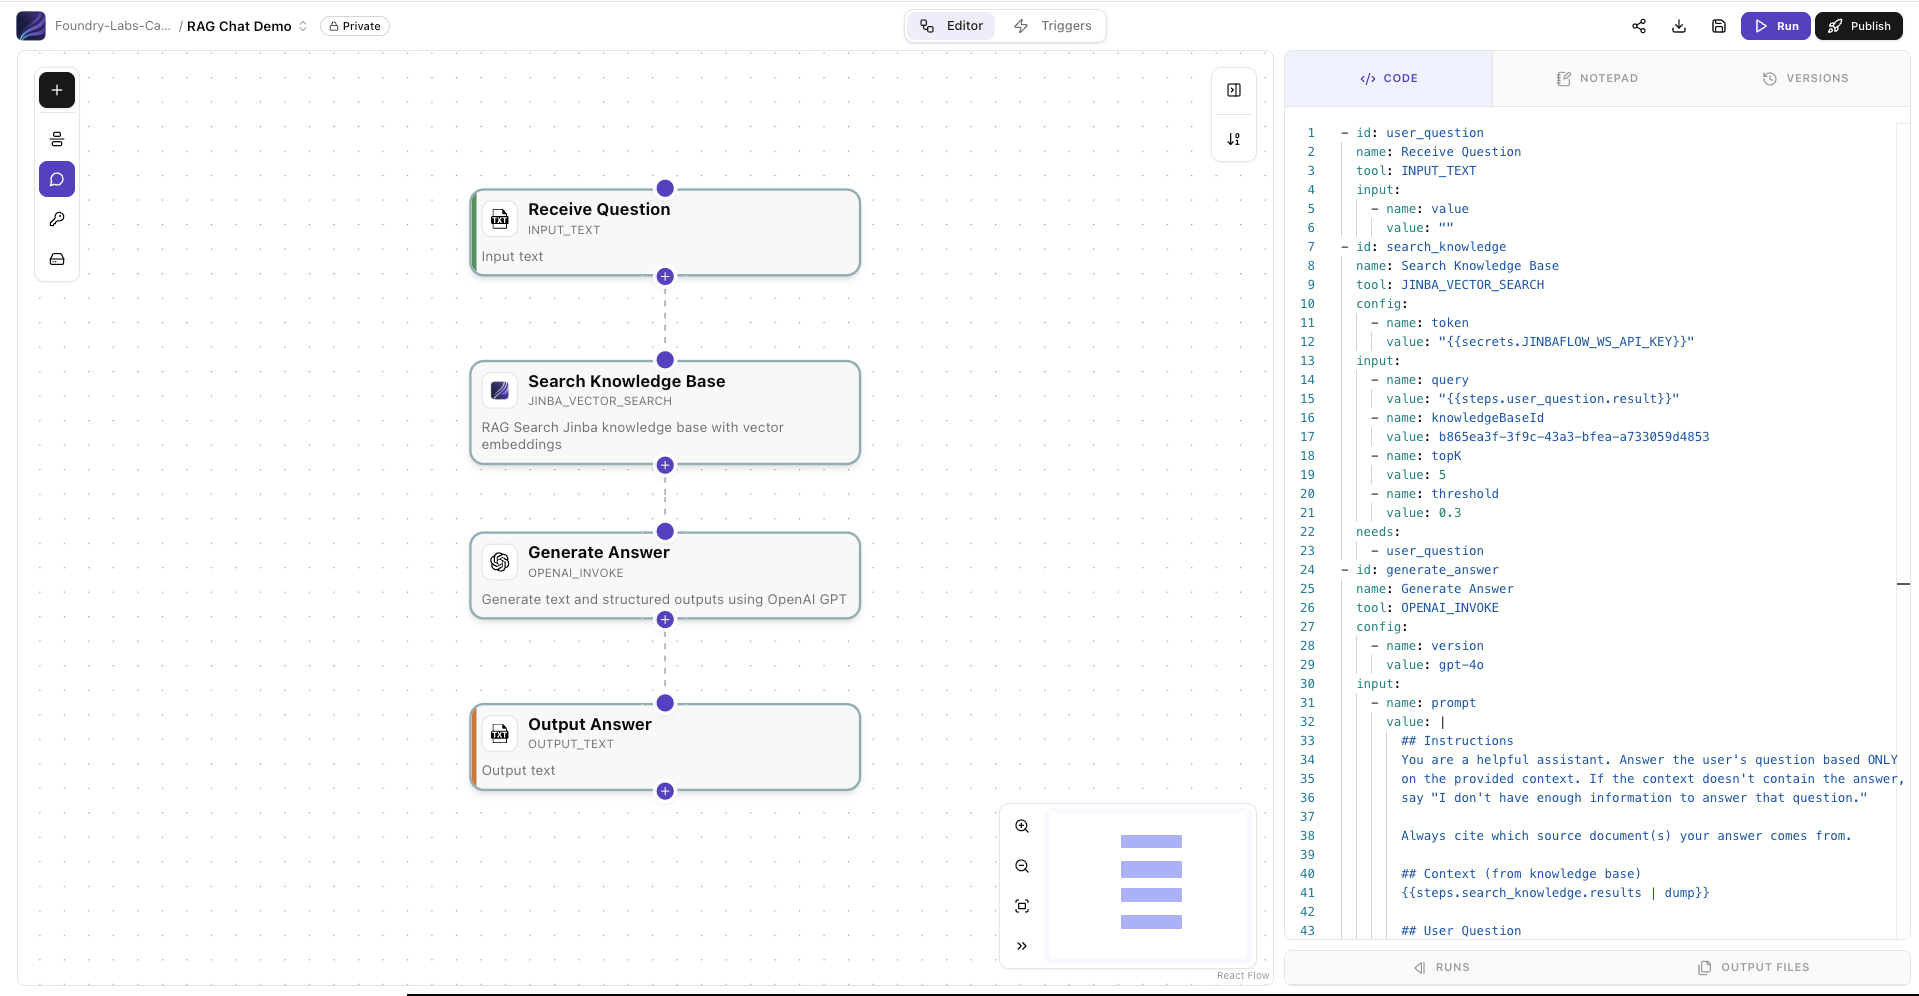
Step 1: Receive Question (INPUT_TEXT)
INPUT_TEXT tool creates an input parameter for the flow. When executed manually, it shows a text box. When called via API, this becomes a parameter in the request body. Learn more about input tools.
Step 2: Search Knowledge Base (JINBA_VECTOR_SEARCH)
needs: [user_question] ensures the search waits for the user’s question before executing. See Step Module Options for more details.
Step 3: Generate Answer (LLM)
| dump filter serializes the search results into the prompt so the LLM can read all retrieved chunks and their sources. Learn more about Variables & Templates.
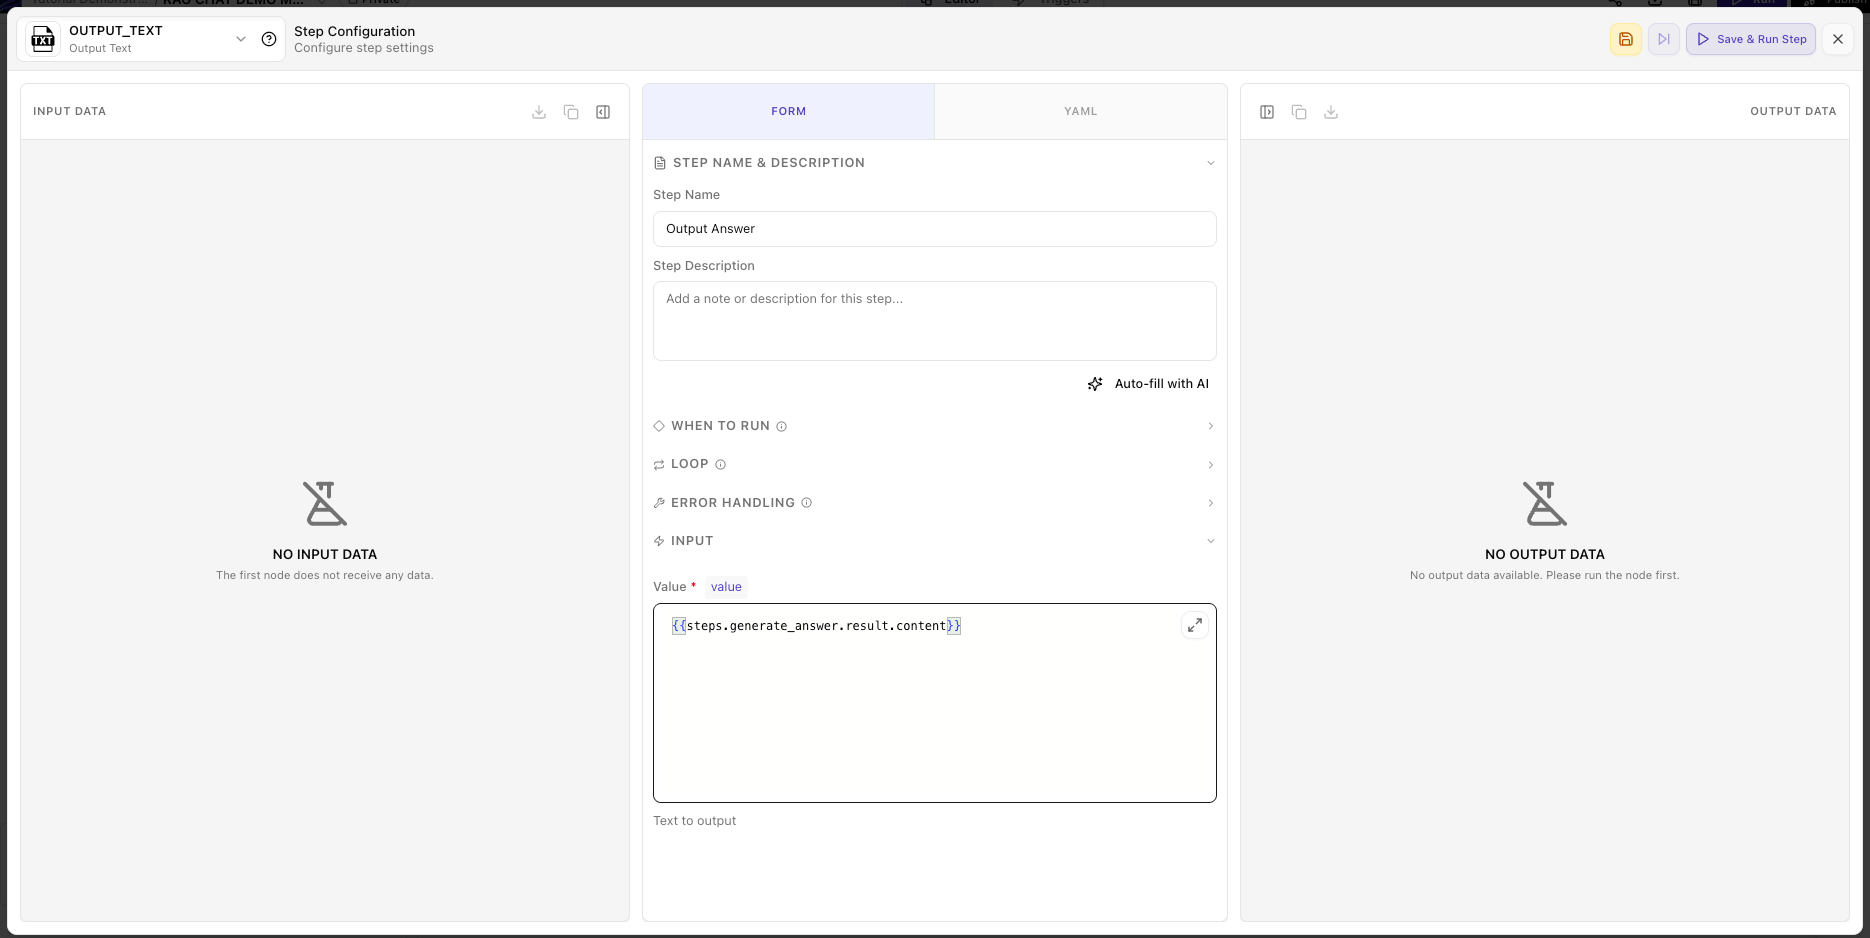
Step 4: Output Answer (OUTPUT_TEXT)
OUTPUT_TEXT step captures the final answer as the flow’s output, making it available when calling the flow via API or chat.
Using Anthropic Claude instead of OpenAI
Using Anthropic Claude instead of OpenAI
Using Google Gemini instead of OpenAI
Using Google Gemini instead of OpenAI
Test Your Flow
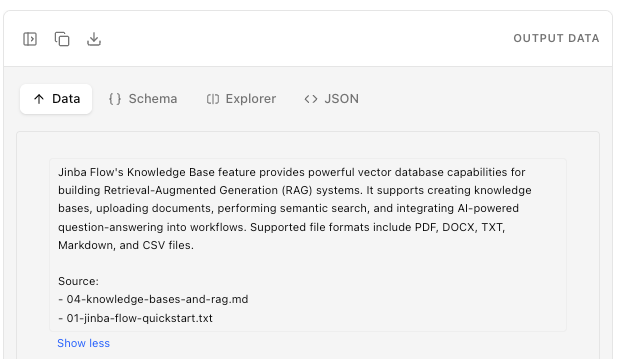
Execute the Flow
Enter a Test Question
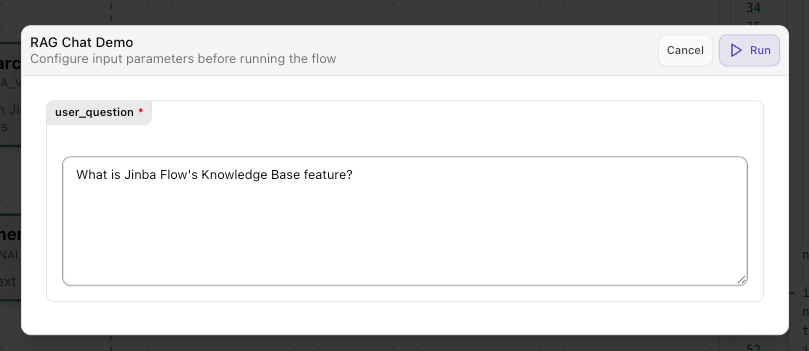
Review Results
Part 3: Deploy as a Chat Interface
Your RAG flow works. Now make it accessible to users.Jinba App Chat
REST API
MCP Tool
Option A: Jinba App Chat (Recommended)
Deploy your RAG flow as a chat connector in Jinba App for the simplest end-user experience.Publish Your Flow

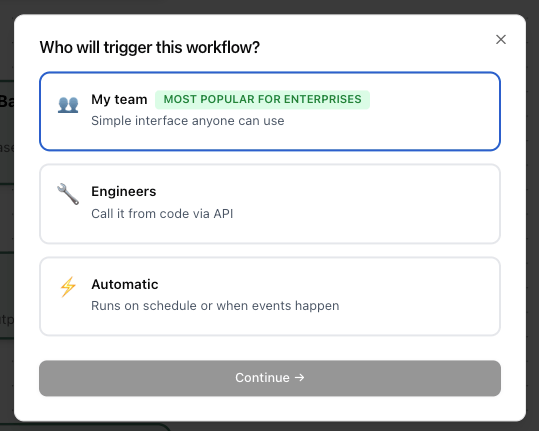
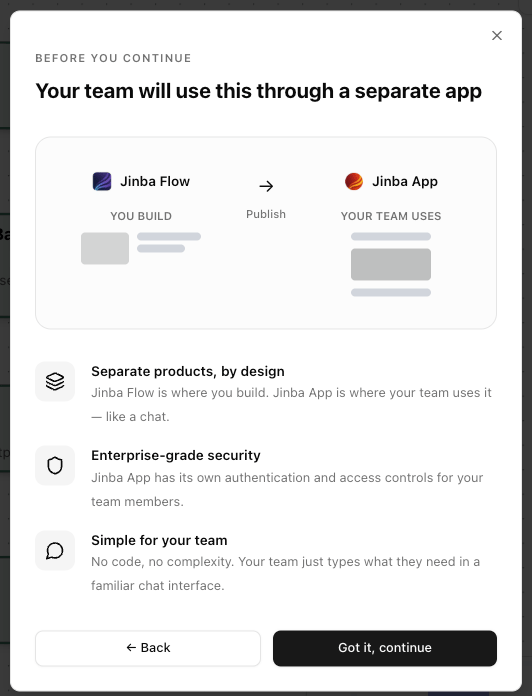
Understand the Jinba Flow → Jinba App Relationship
- Separate products, by design — Jinba Flow is the builder; Jinba App is the chat interface your team uses
- Enterprise-grade security — Jinba App has its own authentication and access controls
- Simple for your team — No code, no complexity — just a familiar chat interface
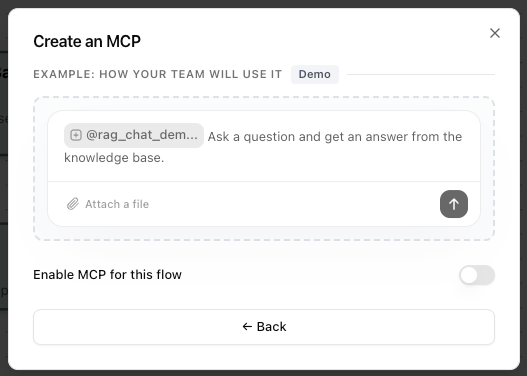
Enable MCP and Connect to Jinba App
-
A chat preview showing
@your_flow_namewith a description - A Demo button to preview the chat experience
-
An Enable MCP for this flow toggle
- Workspace Token — used for authentication
- Connection Snippet — JSON config for MCP clients (Claude Desktop, Cursor, etc.)
- Connect with Jinba App button — click this to open the connector in Jinba App
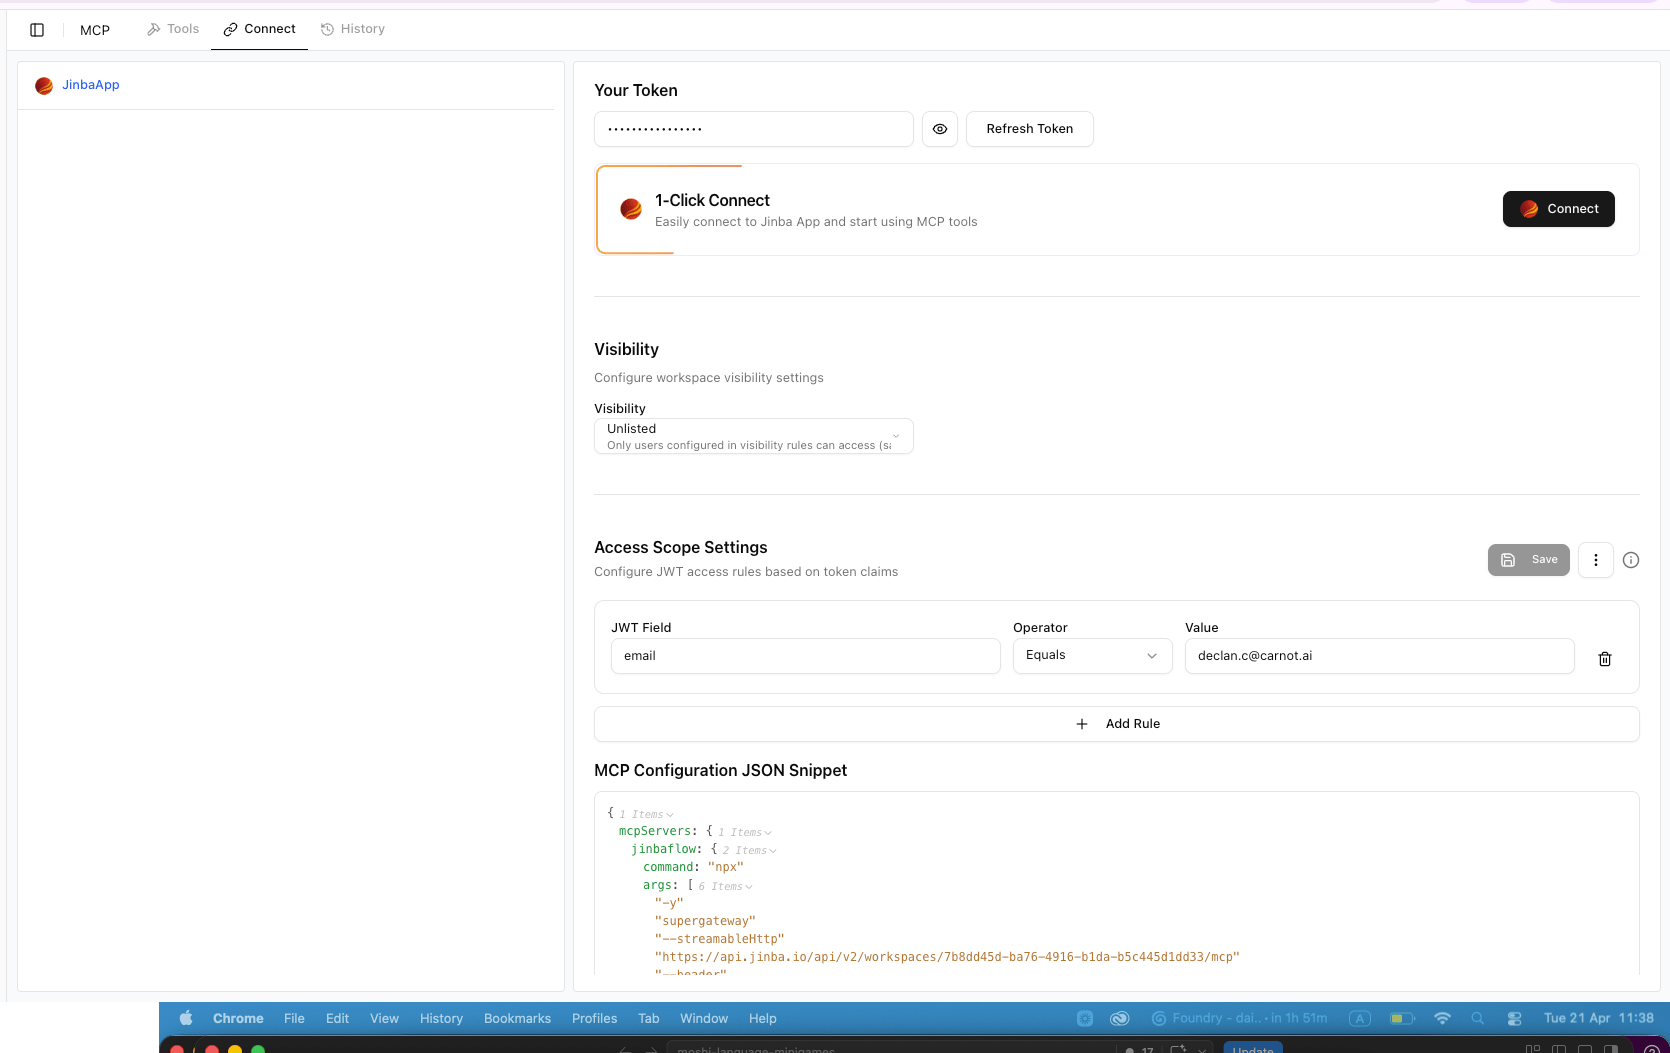
Configure MCP Connection Settings
- Your Token — your workspace authentication token (keep this secret)
- 1-Click Connect — click Connect to instantly link this flow to Jinba App
- Visibility — defaults to “Unlisted” (only users in your access rules can use it). Change to “Listed” if you want all workspace members to see it
- Access Scope Settings — configure who can access this tool using JWT claims (e.g., email whitelist)
-
MCP Configuration JSON Snippet — copy this to use the flow in external MCP clients (Claude Desktop, Cursor, etc.)
Chat with Your RAG System
- Click New Chat
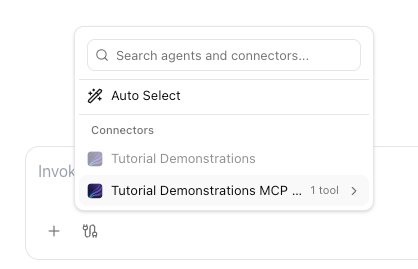
- Click the connectors icon (⚙️) at the bottom of the chat input
- In the “Search agents and connectors…” dropdown, find your workspace’s MCP connector (e.g., “Tutorial Demonstrations MCP … 1 tool”)
- Click into the MCP connector to see your RAG Chat Demo tool listed
- Select the tool — it appears as a tag in the chat input bar
-
Type your question and press Enter
user_question) and Result (the RAG response content) in an expandable section, followed by the AI’s formatted answer.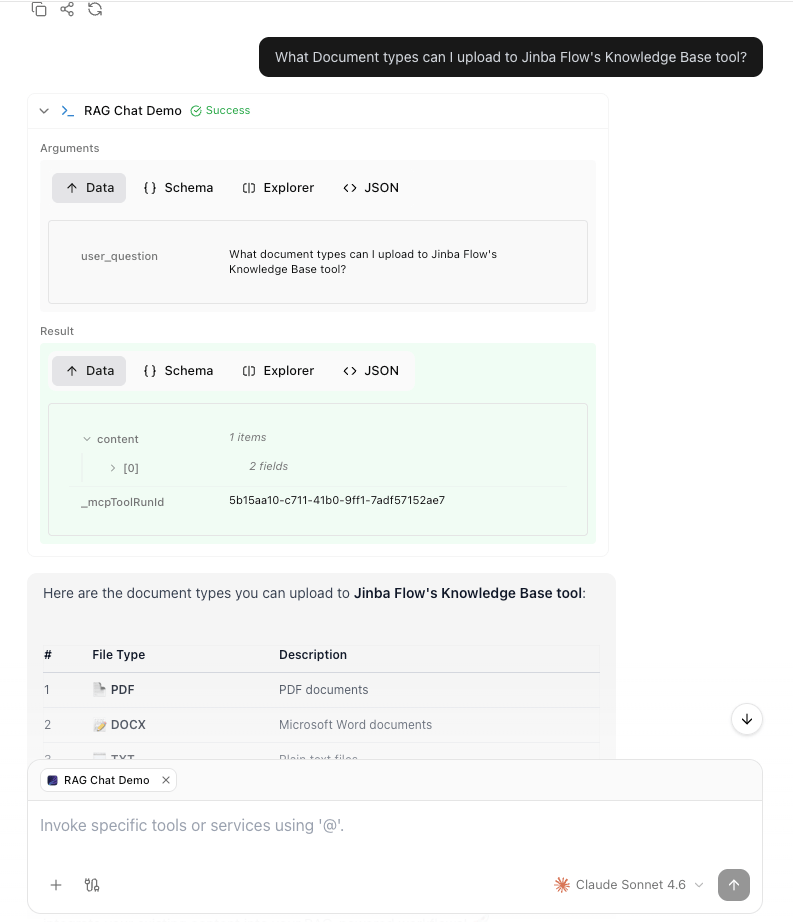
Option B: REST API
Expose your RAG flow as an API endpoint for custom applications.Publish Your Flow
Get Your API Key
Call the API
Option C: MCP Tool (AI Assistant Integration)
Make your RAG flow available as a tool for AI assistants like Claude Desktop.Publish as MCP
Configure Your AI Assistant
Use from Your AI Assistant
Part 4: Advanced Patterns
Multi-Step RAG with Query Refinement
For complex questions, add a refinement step that improves search results:Handling No Results Found
Use conditional execution to handle cases where the knowledge base has no relevant content:Keeping Your Knowledge Base Updated
Create a scheduled flow that automatically updates your knowledge base with new documents:Alternative Backends
The primary tutorial uses Jinba Knowledge Base, but two additional backends are available for teams with specific requirements.When to Choose Each Backend
Alternative A: Pinecone
If you need metadata filtering, namespace isolation, or reranking, use Pinecone as your vector backend.Pinecone RAG Manifest
Replace the search step with Pinecone:Alternative B: Azure AI Search (Enterprise)
For enterprise organizations already using the Azure ecosystem, Jinba Flow supports Azure AI Search as an external knowledge base backend. This option provides advanced indexing, semantic ranking, and integration with Azure Data Lake Storage Gen2.How It Works
Azure AI Search integration operates differently from the built-in knowledge base:- Documents are stored in Azure — uploaded to Azure Data Lake Storage Gen2
- Indexing is handled by Azure — Azure AI Search indexers process and index documents
- Search queries go through Azure — either directly or via Azure API Management (APIM)
- Results flow back to Jinba Flow — where the LLM generates answers
Setup Overview
Configure Azure Connection
Set Up Azure Resources
- An Azure AI Search service with an index configured
- Azure Data Lake Storage Gen2 for document storage
- API keys or APIM subscription keys
- An indexer configured to process uploaded documents
Upload Documents
Search in Your Flow
Key Configuration Options
Azure AI Search Advantages
- Semantic ranking: Azure’s built-in semantic ranker improves result relevance
- Hybrid search: Combine vector search with keyword search
- Built-in indexers: Automatically extract and index content from various file formats
- Enterprise compliance: Data stays within your Azure tenant
- Azure ecosystem integration: Works well with other Azure services such as Azure OpenAI
Tuning & Best Practices
Chunking Configuration
When adding files, tune chunk parameters for your content:Similarity Threshold Guide
Prompt Engineering Tips
- Be explicit about grounding: Tell the LLM to answer only from the provided context
- Request citations: Ask the LLM to reference source filenames
- Handle uncertainty: Instruct the LLM to say “I don’t know” when context is insufficient
- Set the tone: Add persona instructions for your use case (formal, casual, technical)